

HOW TO MAKE A FELTED SIDE-SEAM MOCCASIN-BOOT
SALISH (FLATHEAD) MOCCASIN
To make this Salish (Flathead) moccasin, which is described in the Craft Manual of North American Indian Footwear by George M. White, you draw around your feet to make your pattern. This little paperback has been hard to come by lately, except from used book stores that seem to raise the price considerably (my old copy has a price tag of $4.95!) But it is available from http://www.crazycrow.com/site/native-american-moccasins-george-white-preview/
The pattern at the end of this tutorial is for a medium-width women’s moccasin; if your foot is wide, it might be best to draw around your foot to make your pattern.
Martha Stewart Living magazine featured “Stephanie’s Sewn Felt Slippers” in the December 2011 issue, which are made similarly. She updated the moccasin by making it in wool felt, stitching with colorful threads and giving it a new look at the heel.
It’s a style that doesn’t require a lot of stitching; it has no seam on the inside of the foot, only on the outside. Your foot is almost like a hotdog in a bun – but then you stitch the bun closed.
If you go to:
http://www.marthastewart.com/864540/stephanies-sewn-felt-slippers
you will find comments that may be of interest: I gleaned the url for a video created by Stephanie herself there that is helpful.
There are a couple of blogs in which people show their interpretations of the side-seam slipper:

THE PATTERNS THAT ACCOMPANY THIS TUTORIAL ARE FOR A WOMEN’S SIZE 9 SIDE-SEAM MOCCASIN
To make other sizes of patterns, use a photocopy machine to enlarge or reduce the size of the pattern for the sole until it’s the same length as your foot, when measured by standing on paper with your heels against a wall. Have someone make a mark at the end of your longest toe, measure the distance from the wall to the end-of-toe mark, then adjust the pattern size until the sole is the same length as your foot measurement, or slightly longer. Photocopy all the pattern pieces at this same percentage. Once you have altered the pattern by more than 6 – 8 percentage points, it becomes distorted, so the range of sizes possible to make from this pattern is limited.
You can use Stephanie’s pattern to make children’s boot-moccasins, just add a boot top to it. Measure around the top edge of the moccasin and make a boot-top of this length, adding a flap of 3-4 inches. Three to four inches of height is probably all you’ll need to create the boot-top. You’ll also want to add a tongue, a little longer than the boot-top height.

MATERIALS
Boot: I made my exceptionally-warm moccasin-boots from a felted 100% wool coat, with a felted 100% wool sweater for lining. It’s not hard to find a wool coat that has gone out of style at a thrift shop. To felt these materials, wash both the coat and the sweater on the longest cycle (you might send it through twice) in the washing machine with hot water and a bit of detergent. After that treatment, dry them in the dryer. They should be thickly felted, and unlikely to unravel along their cut edges.
Handmade felt could of course be used to make this boot. This would be exceptionally fun because felters know how to make wonderful cords with wonderful things dangling from them that could be used to wrap around and secure the boot-top. Even those who don’t usually hand-make felt could make these cords from wool batting.
Polar fleece is also nice to use as a lining.
Since this boot was originally made of leather, it of course will be authentic and beautiful if you use leather to make a pair. I recommend using elk or moosehide, but a soft and “drapey” cowhide could also work.

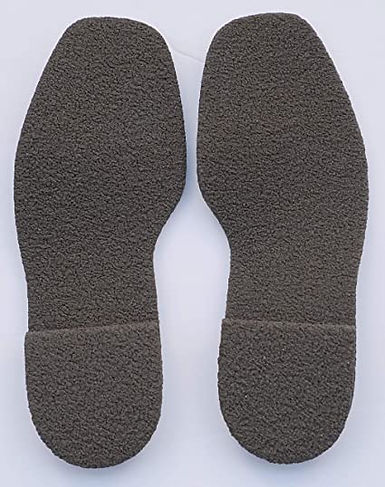
Sole: There are materials recommended online to use as indoor soling, such as suede leather, liquid latex, little “grippy” circles and gritty paint, but I like to use 3/16″ thick natural rubber.
You can also use a 12″ piece of grey carpet runner from Home Depot, thick inner tube, or some used yoga mats.
Stitching thread: Threads made of natural materials on footwear disintegrate over time, so I used nylon waxed braided cord from Tandy Leather to stitch my boots. I like the cord because it’s so strong, comes in nice colors (but no more purple!) and is easy to work with in that it doesn’t get tangled or easily split. However, it’s quite thick and I had to use pliers to pull the cord through the wool after a while, as my thumb got pretty sore. But I think it’s worth it!
Other threads you might use include embroidery floss, buttonhole thread, Tandy’s stitching awl thread, 4-ply waxed Irish linen, or 4-ply thread from Maine Thread.
Spray adhesive: I used this to lightly adhere the lining to the outer material.
Glue stick, duct tape or double-sided tape to temporarily hold the sole in place.
TOOLS
Good scissors
Tapestry needles – I use these to stitch the wool seams because blunt needles have less tendency to split a stitch already in a stitching hole. If you split threads they don’t seat quite so nicely, and are a challenge to undo if you need to.
Sharp needles
Small pliers
Bull-dog clips and/or alligator clips

ASSEMBLY
1. Cutting out pattern pieces:
Alter the pattern so the sole pattern is the same length as your foot (or slightly longer) when measured as described above.
To make the boot-top pattern, measure the length of the moccasin topline (for the size 9 pattern, it would be 12″.) Make a pattern with this length, and five inches in height. Tape the “boot flap” pattern to one end of it.
Make a model of the moccasin in the size pattern you think will fit you, from inexpensive felt, before cutting into any valuable bootmaking material. Adjust the pattern as needed.
Cut out the boot, tongue and boot-top after drawing around the patterns with a permanent marker or chalk. Flip the patterns over to make your second moccasin.
Decide if you want to line your boots or not. If you do, spray the underside of your cut-out pieces with adhesive and lay them on your lining material. After the adhesive dries, cut out the lining material to match the moccasin components.

2. Adding a sole to the moccasin:
I added a natural rubber sole to my moccasin, cut in the shape of the sole pattern. Stitch it to the moccasin with either the simultaneous running stitch (see stitching directions at end of tutorial), a simple running stitch, or a whip-stitch. Depending on the type of soling you use, you may or may not need to punch holes in it before stitching it to the moccasin: natural rubber, yes – if you use a sharp needle, preferably a glover’s needle; suede, yes. CHECK THIS OUT
Carefully cut the sole pattern out of your boot-body pattern so you can use it as a placement guide, as well as use it to cut out your soling material. Put the boot-body pattern on your cut-out boot material and outline the location for the sole on your boot, using one of the marking materials mentioned above. Attach the sole temporarily to the boot with a loop of duct tape, double-sided tape, or apply glue-stick.
3. Embellishing your boot:
If you want to embellish your boot with appliqué, beading, etc, it is of course much easier to do so before your boot is assembled. I stabilized my appliqué with iron-on interfacing before applying a bit of glue-stick to it to hold it in place while whip-stitching it to the boot.

4. Stitching the side-seam of the moccasin:
Decide if you want to use the whip-stitch, which Stephanie used, or the two-needle running stitch that I used to stitch the side seam, and what thread or cord you want to use. Use some clips to align the top and bottom edges of the side-seam, then, beginning at the toe, begin stitching. Occasionally check to make sure that both edges are aligned, and continue stitching back to the heel seam. Find an inconspicuous place, between the body and the lining if you’re lining you boot, to either knot the two ends together if you’re using the running stitch, or make a knot in your single thread if you’re using the whip-stitch.
5. Stitching the heel seam:
Start at the top of the heel seam and again selecting which stitch you want to use, put some clips along the seam and stitch to the bottom of the seam. Make a knot as described above.
6. Stitching the base of the heel seam:
Following Stephanie’s directions, push the tab at the base of the heel in through the slit there. Turn the moccasin inside-out and stitch the tab in place along its edge, just through the lining if you have a lining. Then turn the moccasin outside-out and whip-stitch to close the slit at the base of the heel seam.
The moccasin is complete! Now let’s turn it into a boot..
7. Stitching the boot-top to the moccasin:
Again, you have a choice between whip-stitching the boot-top to the moccasin, or using the simultaneous running stitch or the simple running stitch.
Since Stephanie used the whip-stitch, I’ll use the simultaneous running stitch (and I’m glad that I did, I think it looks better and I think the moccasin will last much longer). Start stitching the boot-top to the moccasin on the outside of the boot, where the boot-top has a straight edge. Hold the two layers together and use a bulldog clip to align them an inch or so further along the seam. Thread a needle with a piece of thread about four times the length of the distance you will be stitching, and put a needle at each end. Continue stitching until you reach the other end of the moccasin top-edge. Make a knot in an inconspicuous spot, run the end of your thread through a bit of material and clip it off.
8. Adding ties to cinch the boot close against your leg:
If you have lined your boots, I suggest you figure out how you are going to add the ties (if that’s the way you want to cinch your boots) to the boot before stitching the edges of the boot body and lining together. I attached my ties at the vertical edge of the moccasin topline: see photo. I would have preferred to make holes in the boot and lace them as shown in the Craft Manual. But dealing with holes in wool, even felted wool, requires making buttonhole stitches or something to strengthen the edge of the hole – so I decided NOT to make holes, and stitched the ties to the boot while stitching the lining and boot body together.
There are many ways that you can hold the boot close against your leg: you can attach a piece of velcro to the underside of the flap and the other piece on the boot-body; you could add big snaps or buttons and buttonholes (or loops if you don’t want to cut into the boot-body); you could have a separate broad band with velcro on one end and the other half at the location on the band where it would cinch the boot in snug, or use a long shoelace or leather thong.
How I made the ties on my boot:
I wanted to use the same army-blanket material to make my ties that I used to make the appliqué. I cut two strips from the blanket 1 1/2″ wide, and 20 inches long. I didn’t want any raw edges exposed, so I turned both edges in, and used a piece of nylon thread to whip-stitch the ties closed.
9. Stitching along the topline of a lined boot:
If you have lined your boot, the only way to keep the lining in place is to stitch the two layers together. Use whichever stitch you prefer, on the edge of the moccasin top-line. If you want to attach the end of a tie in this area, as I have done, stick about 1/2″ of the tie between the two layers and secure the end of it as you stitch the boot-body and lining together. When you stitch to the other end, insert the other piece of tie and stitch it in place.
Even if you haven’t lined your boot, you might want to stitch along the topline for the look and/or durability that stitching adds.
10. Stitching the tongue and attaching it to the boot body:
If you have lined your tongue, stitch around the edge of it to permanently attach the lining to the outer material. A lining for the tongue might not be necessary, even if you have lined the rest of your boot. Note that when I stitched around the edge of the tongue to secure the lining, I stitched a bit at both sides of the base of the tongue.
Using one of the recommended stitches, center the tongue along the instep seam of the moccasin and stitch it in place. The base of the tongue is wider than the space along the instep seam; the extra material on both sides makes sure that your foot doesn’t peek out in this area.
Once the boot-top and tongue have been stitched in place, and some method for cinching the boot close to the foot has been executed, your boot is complete!
The “two-needle running stitch”: In essence you are using a running stitch (down in one hole, up in the next, etc) but with a needle at both ends, you fill in all the spaces as you to stitch (“splurge on thread” is my motto, born of many painful experiences).
Start by pulling one needle and half of the thread through the material where you’d like the first stitch to be, then bring that thread up about 3/16″ further along the seam. Pass the second needle down into the same stitching hole, while holding the thread that is already there to the side of the hole, to protect the first stitch from being split.
Give a good tug on both threads after each stitch to create a nicely-seated seam. Keep repeating this process.
Your work won’t look as neat if you decide to make a running stitch with one thread all along the seam, then fill in the gaps with the other thread; the relationship doesn’t work, and you’re missing that tug on both threads after each step that makes the threads grab each other and settle in.
The whip-stitch: The whip-stitch goes over and under the sole you are attaching, as shown in this drawing. It can also go over the edge of two pieces of material that you stitch together.
One last thought: Using a stitching awl – You can use a stitching awl for all the two-needle running stitching that making these boots requires. There’s a video on my blog that shows how to use it.
PATTERNS: Cut out and tape patterns A,B,C, and D together as shown in last pattern; The patterns represent the outside of the right foot. Pattern A-C folds under pattern B-D.


